The Professional List for a Perfect Interlocking Pathway Paving Installment
A walkway made of interlocking pavers looks simple when finished, a clean band of stone guiding feet across a property. The path to that clean result is anything but simple. Subgrade behavior, edge restraint, joint stabilization, cut quality, drainage details, and staging all decide whether a walkway feels solid underfoot five winters from now or humps and ruts after the first freeze. The contractors who deliver flawless work do not wing it. They follow a disciplined checklist that covers planning, soil, materials, and execution, and they verify at each stage.
This guide distills what has worked on hundreds of Walkway Paving Installation projects, from modest garden paths to multi-hundred-foot campus promenades. It folds in lessons from Driveway Paving Installation as well, because many walkways tie into driveways and share the same base logic. The goal is to help working contractors and project managers set up predictable results while avoiding expensive callbacks.
Start With Outcomes, Not Tasks
Every installation decision should roll back to how the finished walkway should perform. A residential path needs to drain, resist heaving, stay flat enough for strollers and wheelchairs, and meet the owner’s expectation for clean lines and uniform color. A commercial site adds higher foot traffic and sometimes light maintenance equipment or golf carts. Define those outcomes early and put numbers on them. Typical targets include a walking surface slope of 1.5 to 2 percent for drainage, flatness within 3/16 inch over 10 feet, and edge stability that resists lateral movement beyond 1/8 inch over the first year. If you do that before anyone picks up a shovel, trades and clients stay aligned and decisions get easier.
Scoping and Documentation
Scope creep hides in small details, especially with interlocking pavers. The owner may assume lighting sleeves and a conduit path under the walkway are included. The site plan might not show the step where the walkway meets a porch. You want clean drawings, clear elevations, and written specs for base depth, paver thickness, joint material, sealer selection, and snow maintenance. If you inherit a thin, ambiguous scope, your risk goes up and so does the chance of arguments.
Preconstruction documents checklist:
- Scaled plan with spot elevations, slopes, and tie-in points
- Cross section with base thickness, bedding layer, and paver size
- Material schedule, including paver model, color blend, edge restraint, geotextile, and joint sand type
- Utility locate and sleeves plan for irrigation, lighting, and futureproofing
- Written tolerances for flatness, joint width, and color blend acceptance
Soil and Subgrade Intelligence
The soil under a walkway determines most of your success. A sandy or gravelly native soil drains quickly and compacts well. A clay subgrade holds water and swells, and organic soils like topsoil or loam settle unpredictably. Do not guess. Probe with a spade along the path. If the shovel comes out with a smeary ribbon of clay, plan for undercut and stabilization. If you hit fill with mixed debris, remove it until you reach uniform, undisturbed ground or stabilize it with compacted aggregate in lifts.
You can manage risk with a simple regime. Strip organics until you see firm native soil. If conditions are wet or the soil pumps underfoot, add a non-woven geotextile to separate the subgrade from your base aggregate. On heavy clay sites, use an open graded base or lime-stabilize the top few inches if the owner permits the cost and schedule. Keep the subgrade shaped to the finished slope so water moves, not pools.
Aim for subgrade compaction around 95 percent of standard Proctor where you can verify it. If you do not have a nuclear density gauge or third-party testing, mock test with a dynamic cone penetrometer or at least a rebar probe for consistency, paired with method compaction: multiple passes, uniform lift thickness, and controlled moisture.
Drainage Is Not Optional
Interlocking walkways handle water in two ways: across the surface or down through the joints and bedding. Most residential jobs are installed as impervious surfaces with tight, sand-filled joints. That puts the burden on the cross slope and the ability of the base to shed incidental water. Maintain 1.5 to 2 percent cross fall to a lawn or bed that can accept runoff. Avoid trapping water against a foundation. Where the path parallels a building, add a narrow swale or discreet channel drain if space is tight.
In climates with freeze-thaw, let water escape vertically and laterally. Grade the subgrade and base with the same slope as the surface. Place a separation geotextile over subgrade that tends to migrate. If the client wants permeable joints or a true permeable system, switch to open graded aggregate for both base and bedding, and provide an underdrain if native soils are slow. Do not mix systems halfway. The hybrid you did to save a day can trap water and build ice.
Design Choices That Influence Buildability
The paver itself sets many downstream choices. A 60 mm thick concrete paver works well for most walkways. If the path doubles as a service lane or meets a driveway apron that sees cars, step up to 80 mm in that segment. Irregular or tumbled pavers hide small lippage better, but they slow cutting and alignment. Smooth, rectified edges demand tighter base work and more careful jointing to avoid chipping. Dark colors hide stains, light colors run cooler in sun. Blend variation masks efflorescence and future patching. These are small trade-offs that change man-hours by 10 to 20 percent.
Pattern also matters. Running bond or herringbone locks well and distributes load. Herringbone gives better shear resistance under wheels or turning strollers, which is why it shows up in Driveway Paving Installation so often. Basketweave looks charming in gardens, but it creates more small cuts at curves and steps. If your alignment includes a lot of arcs, choose a pattern that accommodates wedges without creating slivers.
Material Logistics and Staging
Bad staging costs a day on a small job. Put pallets where the machine can reach them throughout the build, not just at the start. Plan the laydown path so you are not wheelbarrowing bedding sand across placed pavers. Use plywood or temporary mats if you must cross finished work. Keep joint sand dry and covered. Moist polymeric sand turns into a headache before you even open the bag.
Deliver aggregates in separate stockpiles on geotextile or hard ground to avoid contamination. For dense graded base, a well-graded mix such as 0 to 3/4 inch crushed stone is common. Keep the pile shaped to shed water. If you are using an open graded base, such as 3/4 inch clear stone, be disciplined about keeping fines away from it. A stray loader bucket of millings or soil ruins permeability.
Safety and Neighbor Relations
Walkway jobs thread through people’s lives. Keep access paths clear and stable. If this is the only route to a front door, build a temporary ramp or leave a safe bridge. Mark elevation changes with bright paint or tape. Dust control matters when you dry-cut pavers. Accounting for weather and cutting location can keep neighbors on your side without needing a long apology.
Excavation and Subgrade Preparation
Strip sod, roots, and topsoil to the designed depth. For a standard residential walkway carrying foot traffic, plan for 6 to 8 inches of compacted base plus 1 inch of bedding and the paver thickness, often 60 mm or about 2 3/8 inches. That puts your excavation depth at roughly 9.5 to 11.5 inches below finished grade, more if you are replacing soft soils with compacted aggregate.
Shape the subgrade to mirror the final cross slope. That way the base has uniform thickness. Scarify the top inch decorative brick paver installation of subgrade with a rake or harrow, adjust moisture so it forms and holds a ball without sticking to your hand, then compact. Walk-behind plate compactors struggle on thick lifts. Keep lifts to 3 inches for base material and thinner for clayey subgrade to get density through the depth.
Geosynthetics: Where They Earn Their Keep
A non-woven separation fabric between subgrade and base stops pumping and keeps fines out of your base. On silts and clays, it can be the cheapest insurance you buy. Use a fabric rated for subgrade stabilization, not a thin landscape fabric. Overlap joints by at least 12 inches, more if the subgrade is especially weak. For permeable or open graded assemblies, a woven fabric may line the trench sides or isolate layers as part of a designed drainage path.
Geogrid is rarely necessary for typical walkways, but on very soft ground or on slopes it can reduce base thickness and add stability. Follow the manufacturer’s embedment and overlap guidelines. If you have to ask if geogrid is worth it, the soil probably told you yes when your boot sank.
Building a Base That Stays Put
Dense graded base gives you a solid, interlocked platform. Use a crushed angular aggregate, not rounded stone. Import clean material and avoid recycled base unless you know its fines content and plasticity. Place it in even lifts at 3 inches loose, compact to about 2.25 inches, repeat. Keep the surface shaped to final slope and grade as you go so you do not fight it later.
Compaction is a process, not a single pass. A reversible plate compactor or small trench roller can give you energy in tight spaces. Make at least two to three passes per lift, more on the first lift over weak subgrade. Listen to the machine. The tone will rise as the aggregate locks. Your heel test helps too. If your boot leaves a deep print, you are not there yet. If you can scuff the surface without it unraveling, density is acceptable for most walkway traffic.
For projects that choose an open graded base, the compaction dynamic changes. Angular, single-size stone relies more on interlock than fines. Use a high-frequency plate compactor and expect less tone change. Verify interlock by probing and by the lack of movement under foot.
Edging: The Unsung Hero
Pavers do not float by themselves. Edge restraint contains the field and takes lateral load from cart wheels, toddlers making sharp turns, and frost. You have options. A poured concrete haunch is common along beds and lawns. It should be thick enough to resist cracking, often 4 to 6 inches wide at the base, 6 to 8 inches tall, with its toe keyed into compacted base, not loose soil. Plastic edge restraint with stakes is fast and works well when installed on top of compacted base with spikes driven through the base, not just the bedding sand. Aluminum profiles look sharp in modern landscapes and give crisp lines, again installed on the base, anchored tight, and buried to hide sight lines.
On curves, cut the edging as designed by the manufacturer so it bends without buckling. Where the walkway meets a rigid structure like steps or a slab, consider a control joint in the haunch or a small isolation gap to allow independent movement.
Bedding the Sand
The bedding layer is thin, but it solves for small imperfections. Use well-graded concrete sand that meets ASTM C33 or a specified bedding sand. Avoid masonry sand that is too fine and can hold water. Screed to a uniform 1 inch thickness using rails and a straightedge. I still carry two pieces of 1 inch conduit for this, though aluminum screed rails are nicer on long runs. Do not walk on the screeded bed. If you must, place kneeboards. If a section gets disturbed, pull it, re-screed, and move on. Laying pavers on uneven or overthick bedding is how small lips turn into tripping edges.
Permeable builds swap the sand for 1/4 inch clear chip. Screeding is similar, but take care to confine the bedding stone so it does not migrate into the base.
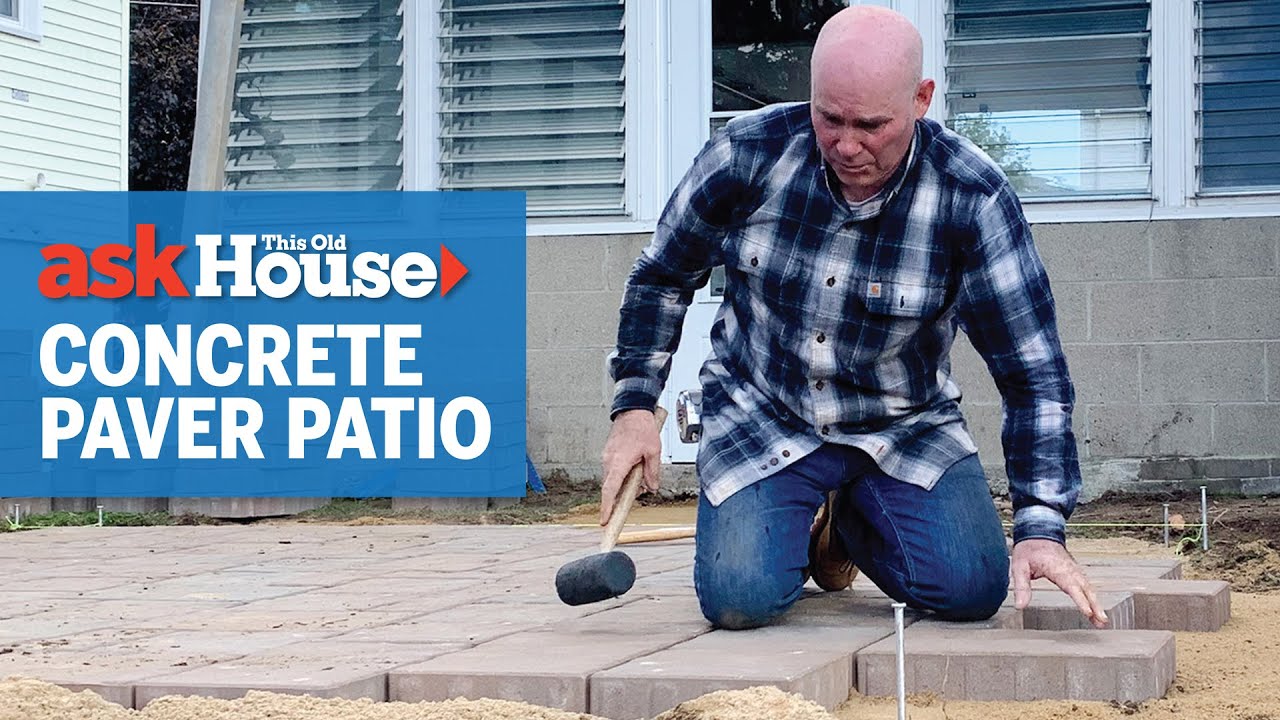
Laying the Field
Start from a straight, hard control line, ideally a building face, a stringline, or a tight chalk line you can see. Dry lay the first two or three courses and check that the pattern tracks with curves and that you are not creating slivers at edges. On blends, pull from at least three pallets at once to avoid color banding. I like to rotate bands from each pallet so the field looks natural rather than striped.
Keep joint spacing consistent. Most interlocking pavers have built-in spacers, but human hands still decide if a joint opens or pinches. Over a run, a 1/32 inch error per piece adds up to an ugly skew. Tap gently with a rubber mallet to seat each unit in the bedding, but do not pound. Pounding risks kneading the sand and creating waves.
Cutting Cleanly and Safely
Curves and details make a walkway look designed, not dumped. A track saw or table saw with a diamond blade gives accurate, chip-free cuts, especially on textured pavers. For less setup time, a handheld saw with a guiderail and a steady hand works. Wet cutting controls dust and cools the blade, but plan for slurry control. Dry cutting with a vacuum shroud and HEPA vac keeps neighbors happy and lungs healthier. Measure twice and aim for half or larger pieces at boundaries. Anything less than a third of a full paver at the edge asks to fail in freeze-thaw.
Mind the pattern at utility lids, step risers, and transitions. If a lid ends up inside a paver, cut a clean circle and bond the ring to the lid if permitted, or frame around it with symmetrical cuts. At steps, check headroom and riser uniformity. Varying a riser by more than a quarter inch is noticeable and can be a trip hazard.
First Compaction and Jointing
Once the field is placed and cut, it is time to lock it. Sweep a thin layer of clean, dry joint sand over the surface. Use a plate compactor with a urethane mat or a thick rubber pad to protect paver faces. Compact in overlapping passes, starting at the edges and working inward. The goal is to vibrate the pavers into the bedding, not to crush joints. Expect the field to settle slightly as sand fills voids and bedding consolidates. Top up joints and repeat. Two passes are standard on a walkway. On larger format slabs, reduce vibration amplitude and use more gentle passes.
For polymeric sand, follow the manufacturer’s joint width and depth requirements. Do not overfill. Carefully blow off the surface, then mist lightly in multiple passes so water activates the binders without flooding the joints and washing them out. Watch the weather. A surprise shower during activation leaves streaks and cleanup that no one enjoys.
Sealing: When and Why
Sealer is optional. It adds stain resistance and can pop color, but it also changes the maintenance equation. If the client wants it, wait until the installation is dry and joint sand has had time to settle, usually a week hardscape contractor company or more of dry weather. Use a breathable, penetrating sealer for most walkways. Film-forming products can turn slick when wet and do not breathe as well. Test a small area, especially on blended or tumbled pavers, to ensure the visual effect matches the owner’s taste.
Tie-ins to Driveways and Other Surfaces
Walkways often meet a driveway or cross a curb. That joint takes abuse from vehicles and snow equipment. Borrow techniques from Driveway Paving Installation. Increase base thickness near the tie-in to 10 to 12 inches compacted if vehicles can load the edge. Use 80 mm pavers at the interface or a soldier course of thicker units. Where the walkway meets asphalt, sawcut a clean edge and create a flush or slightly proud transition so snow blades do not catch the paver edge. Consider a small concrete header course, steel edging, or a hidden curb if the site sees plow work.
At porches and stoops, check water paths. A tiny back pitch sends melt water against a foundation. Check the door threshold height and remember to keep the final surface at least 2 inches below wood siding. If siding drops to grade, suggest a trim detail or flashing upgrade. You will be the one blamed for rot later if you build tight.
Accessibility and Comfort
A walkway should welcome all users. Stick to slopes under 5 percent for comfort and ADA accessibility where applicable, with cross slopes under 2 percent. Keep joints tight and lippage under 1/8 inch. Choose textures that offer grip in rain but do not catch heels or wheels. Add tactile cues where a path meets a drive or street. Small decisions, such as aligning cuts away from ambulation lines or widening a narrow choke point by a foot, improve daily use more than most owners realize at design time.
Cold Climate Details
Freeze-thaw punishes laziness. Keep water moving. Do not let downspouts discharge onto the walkway. If the property relies on deicers, warn the owner that magnesium chloride is gentler than rock salt on concrete pavers, and advise a rinse in early spring if feasible. Joint stabilization helps resist washout during winter rain followed by freeze. On steep paths, rougher textures and polymeric joints provide more grip and less migration.
Snow equipment is another reality. Instruct owners and property managers to use polyurethane blade edges or rubber edges when clearing the walkway. Metal shoes and aggressive angles can chip edges and pop border pieces no matter how well you build.
Quality Control Points That Save You
There are a handful of moments where problems are cheapest to catch. Check elevations and slope after excavation but before base goes in. Confirm base thickness after the first lift compaction by measuring at several random points. Set a 10 foot straightedge on the compacted base and look for 1/4 inch humps or valleys. Correct them now. stone walkway paving After screeding, resist the urge to tweak with your hand. If you see a dip, pull the rails and re-screed.
When laying pavers, pull a string across the field every few courses. If the line bows more than 1/8 inch, reset. Before you compact the field, walk it and feel for rocker pavers that teeter. Lift those and add or remove a pinch of bedding. After final compaction, inspect borders. You want continuous contact between edge restraint and the compacted base, with spikes secure and haunches solid. If something feels soft now, it will move later.
Common Mistakes and How to Avoid Them
Most failures trace back to water and movement. A walkway built on soggy subgrade that never drained will settle in winter and pump bedding to the surface. Skimped base thickness shows up as dips, especially where heavy pots or carts sit. Using the wrong sand turns joints into canals or mush. Rushing cuts leads to slivers that pop. Power compacting without a pad scuffs smooth-faced pavers and leaves permanent tracks.
The fixes are unglamorous. Respect lift thickness. Keep materials clean. Protect the bedding. Do not lay in the rain unless the system is permeable and designed for it. Pull more pallets than you think you need to blend color. Do not trust eyeballs for slopes, use a level or digital inclinometer. Thirty extra minutes spent on control lines can save three hours of rework.
Handover, Maintenance, and Warranty
A flawless install can still fail in the owner’s hands if they do not know how to use it. Provide simple maintenance guidance. Most pavers want only sweeping, a gentle rinse, and periodic top-offs of joint sand if needed. Stains respond better to immediate blotting than to pressure washing. Weed growth usually means debris has created a fine-growing medium in joints, not that plants are coming from below. Explain that and offer a spring service to clean and refresh joints.
Final handover checklist:
- Confirm surface slopes, flatness, and joint fill meet spec
- Photograph finished work, edges, tie-ins, and critical details
- Deliver maintenance guide, sealer data if used, and snow removal notes
- Document any as-built changes, locations of sleeves, and underdrains
- Provide written warranty terms and point of contact for service
A Short Field Story That Stuck
On a lakefront job years ago, the homeowner wanted a narrow S-curve walkway between perennial beds. The soil was a band of sandy loam with clay lenses. The first rain turned the subgrade to peanut butter in two low spots. We could have pushed forward, but the crew lead stopped, brought in non-woven fabric, undercut another 6 inches in the worst areas, and rebuilt with compacted aggregate in tight lifts. It cost half a day. Two seasons later we were back sealing the driveway. The walkway looked and felt new, while the neighbor’s path had already heaved and settled. The difference was not magic, just a decision at the right time guided by a mental checklist that said the subgrade was not ready.
Bridging Walkways and Driveways Without Compromise
When a walkway feeds a driveway, you have one threshold where expectations collide. Feet expect comfort, wheels add force. The detail that works is simple. Thicken the base in the last 2 to 3 feet next to the drive. Use thicker pavers there or switch the pattern to a nested herringbone that matches the driveway’s locking strength. Anchor the edge with a concrete header hidden under the adjacent lawn. Shape the joint so water does not sit. This hybrid detail borrows what is proven in Driveway Paving Installation and preserves the clean look of the walkway.
Cost, Time, and Honesty
Most clients ask how long and how much. For a typical 4 foot by 40 foot walkway with curves, in a moderate soil, expect two to three working days for a crew of three, not counting material lead time. Costs vary with region and material selection, but your base and labor will outweigh the pavers themselves by a wide margin. If you price too low by assuming perfect soil and easy access, you might be the one tempted to cut corners. Build contingencies into your estimate for undercut, edge complexity, and weather delays. Tell the owner what is included and what triggers a change order. The best relationships start with a clear scope and no surprises.
The Payoff of Discipline
Interlocking pavers reward careful process. Each stage supports the next. When you own the soil, the base, the edge, and the joints, the field almost lays itself. Years later, your work will still feel firm under a winter boot, shed water on a spring storm, and welcome bare feet on a hot day. That is what a checklist aims for, not to slow you down but to free you from guesswork. If you add or remove steps to suit your soil and climate, do it with intent, not haste. The walkway will keep your secrets, good or bad, for a long time.